So, here I am just getting started on this little blogging escapade, and we'll see just how well this goes.
The purpose of my blog is mainly to document my stitching progress on various assorted items. With the added spice of blurbs about my cats (of which there are 5), life in central Indiana, life in tech support, life in general. But mostly about stitching.
So, let's get to that, shall we?
WIPs
The Castle Garden
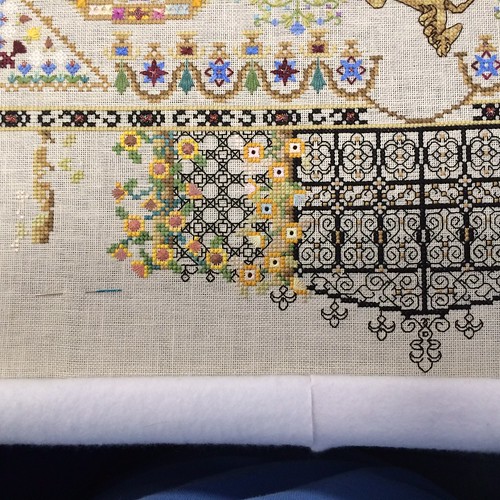
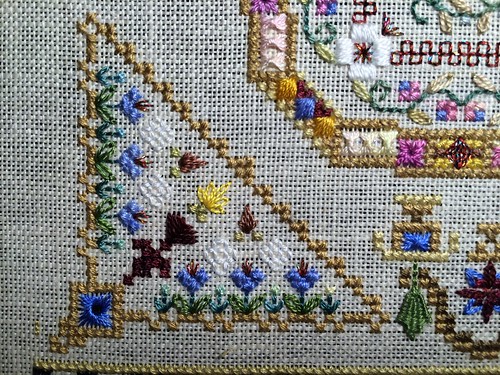
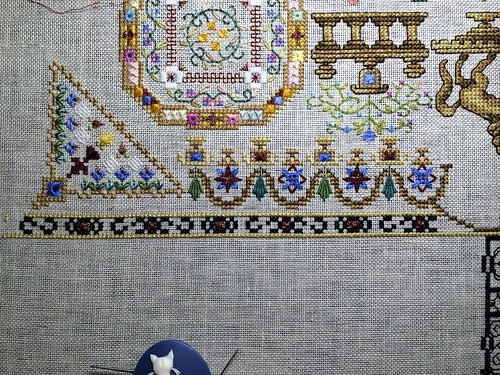
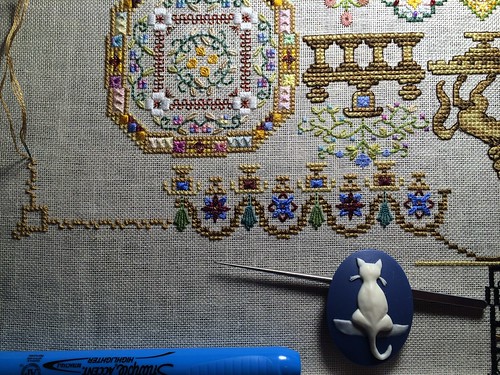
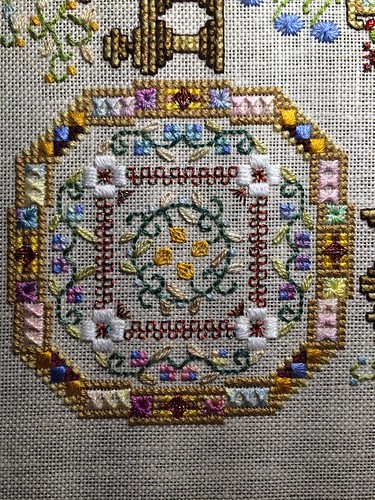
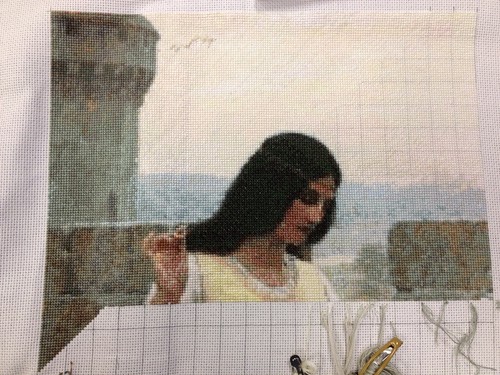
My primary focus has been on The Castle Garden, by Papillon Designs. I started it with the intent of giving it to some very good friends who helped me get through my cancer treatments during the winter of 2012/2013. Chemo. Bleh! BTW, I didn't die - in case you were wondering. Ha! I started CG near the end of September of 2013, it's finished size will be 22"x22" on 32 count linen, stitched over 2. Later, if I feel like it, I will list out what threads I'm using. Here's the link to my Flickr set. But for instant gratification, here's a pic of my latest progress.
 Well, ok, it's not my latest progress. I have gotten some of the octagonal garden in the lower left corner done. But for all intents and purposes, it's more or less that. I'm hoping that I will have her done in about a month, then off to the framer.
Also, I'm not a great photographer. My little Nikon Coolpix L110 is flakey. Which translates to: Amy doesn't know what she's doing! I do some photos with my iPhone or iPad, but they sometimes have weird angles to them.
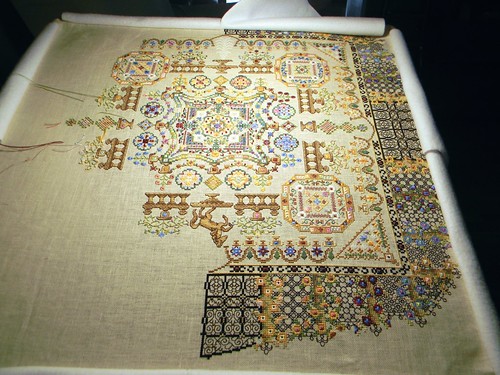
Around the World in 80 Stitches
This one isn't actively being worked, but it isn't technically a UFO either. What's the difference? I dunno. My mood, I guess? But CG has been my total focus. Normally I stitch in a rotation (LOL, I crack myself up) and this is in the rotation. It's the current SAL by Papillon Creations and it's a boat load of fun! It was/is my first foray in to specialty stitches and I was hooked. Now just plain old cross stitch seems boring. Here's the link to my Flickr set. And here's instant gratification - a pic of where I left off.
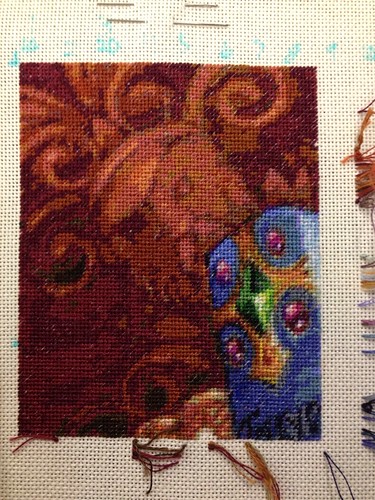
Treasure Quest
You were expecting another Papillon Creations weren't you? Psych! This one is a HAED and I've only got 1 page done on it. It's my tent stitch experiment. Here's Flickr, and here's latest progress photo.
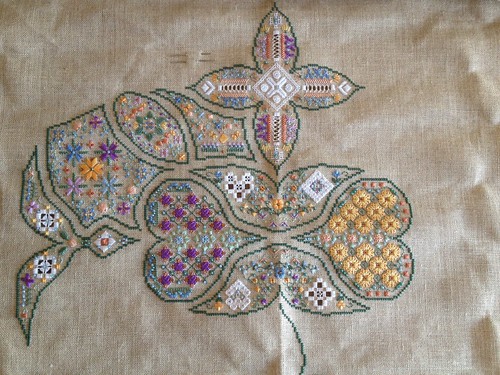
Stitching the Standard
This one is by Golden Kite. I started it...well...hmm. A Long time ago. sometime before March, 2008 LOL meh. Ignore the cut stitches in the upper left corner near the castle tower. I haven't gotten around to fixing it. There's no rush, much to stitch yet and it intimidates me. Here's the Flickr set and here's the most recent progress pic.
 So that's all the WIP's for now. Once CG is done, I'll be starting a Chatelaine and another HAED (a QS for my "neice").
I think this post has gotten a bit large and it's nearly time to go to work. So, I'll come back later with UFO's.